If you find the standard out-of-the-box Shopify admin panel a bit too contriving in product descriptions or filtering, don’t jump into researching its alternatives. You can leverage Shopify metafields to add custom fields for additional information to your store.
However, be warned: Shopify metafields aren’t 100% beginner-friendly. Luckily for you, we at GenovaWebArt have put together this comprehensive guide to creating, adding, editing, and displaying Shopify product metafields.
In writing it, we relied on our experience in Shopify store customization and our Ten Thousand case with Shopify metafields usage. During that project, we managed to implement a complex, multi-component product structure by using metafields.

Shopify Metafields 101: What Are They?
Shopify metafields are custom fields allowing you to add extra information to your store that would otherwise be impossible to add. Those custom fields can be added to anything from product listings and collections to customers and orders.
The values stored in those fields can then be used for various purposes, such as expanding filter search options. Here are several examples of custom fields you can add using Shopify metafields:
- Customer’s food allergies
- Order priority
- Custom product information (e.g., wheel size for bicycles).
Types of Metafields in Shopify
Metafields can be grouped into ten types based on which part of your store they concern:
- Products
- Variants
- Collections
- Customers
- Orders
- Draft orders
- Locations
- Pages
- Blogs
- Blog posts
Whether you’re using Shopify Plus as a Shopify B2B platform or not, you can also add metafields for companies, company locations, and markets.
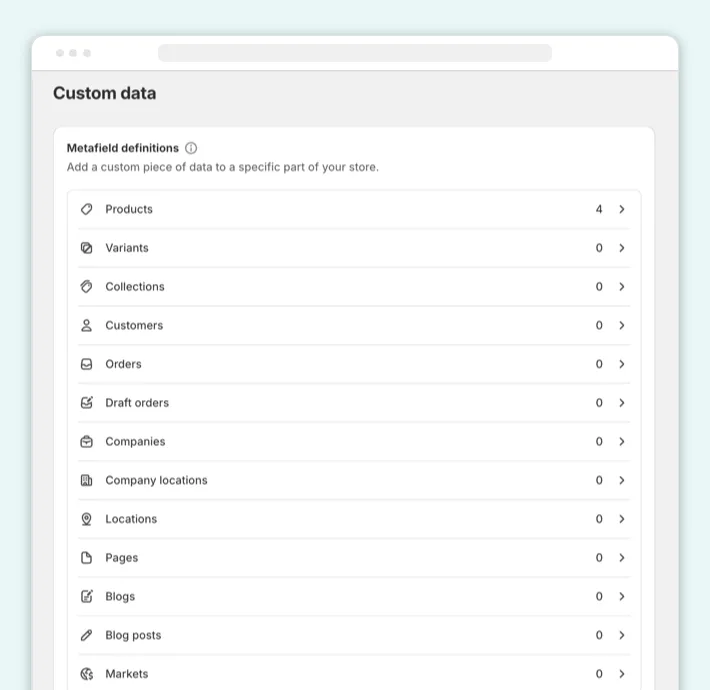
Metafields support different types of data, such as:
- Text (rich, single-line, or multi-line)
- Product
- File
- Numbers (decimals or integers)
- Date/date and time
- Dimension
- Volume
- Weight
- Boolean (true or false)
- Color
- URL
- Rating
- Money
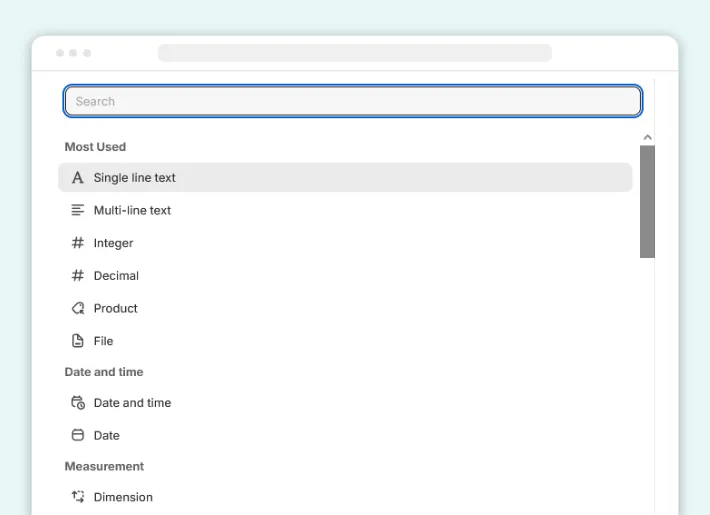
The full overview of supported data types is available in Shopify developer documentation.
With the help of such fields, you can do things like add a manual in the PDF format to every product in your store (that’s a file metafield) or order customization options (e.g., whether or not to engrave jewelry using a boolean field).
Where to Find and How to Use Metafields in Shopify 2.0
Note: this tutorial on Shopify 2.0 metafields concerns users of Online Store 2.0 themes. If your theme isn’t a Shopify 2.0 one, you’ll need to edit the store’s code directly to add and use metafields.
You can view and manage your metafields in your Shopify admin panel (Settings > Custom data). Standard metafields can be added right there without any coding required (more on that below). Non-standard metafields, however, have to be added to the theme code.
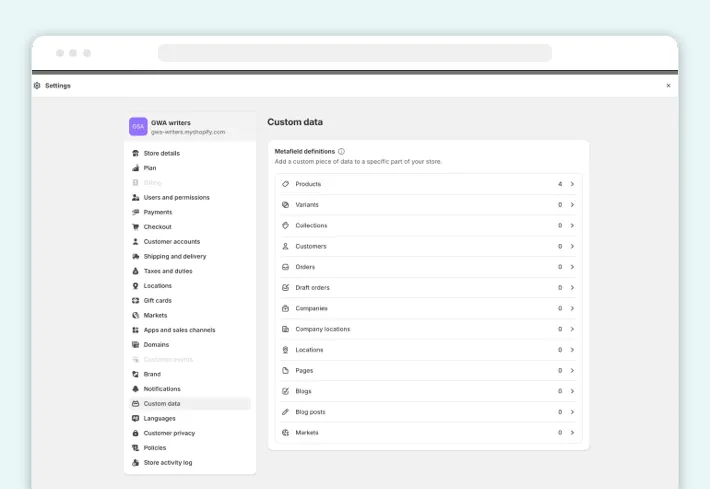
As of spring 2024, Shopify allows you to use up to 250 metafield definitions in your store.
You can use metafields for:
- Custom product properties and attributes (e.g., the release date and catalog number for books)
- Advanced customer profiles
- Order instructions
Let’s say you want to add custom fields to your sunglasses products and their variants and display that extra information on the product page. To that end, you’ll need to:
- Create a definition for the metafield itself
- Add the metafield to relevant products or variants
- Display the metafield on the corresponding pages
Let’s break down how to create, add, display, and edit metafields, including Shopify variant metafields.
How to Create Metafields in Shopify via Admin Panel
To create a metafield in Shopify, you need to first define it. For that, head to your Shopify admin panel, go to Settings, and select Custom data in the left sidebar. You should now see a list of various metafield types you can add.
Select the type of your future metafield and click Add definition to create it:
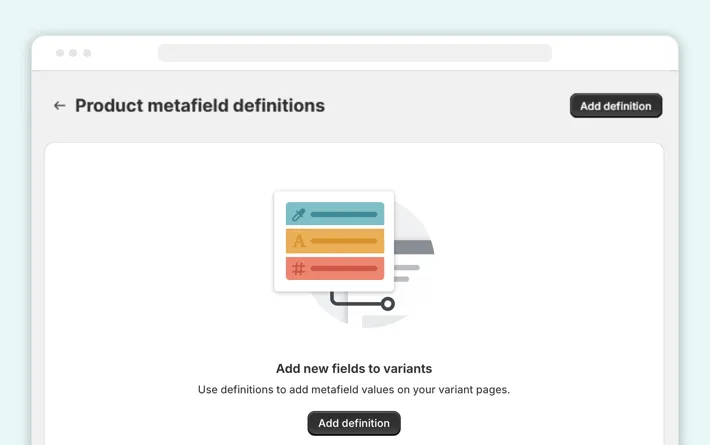
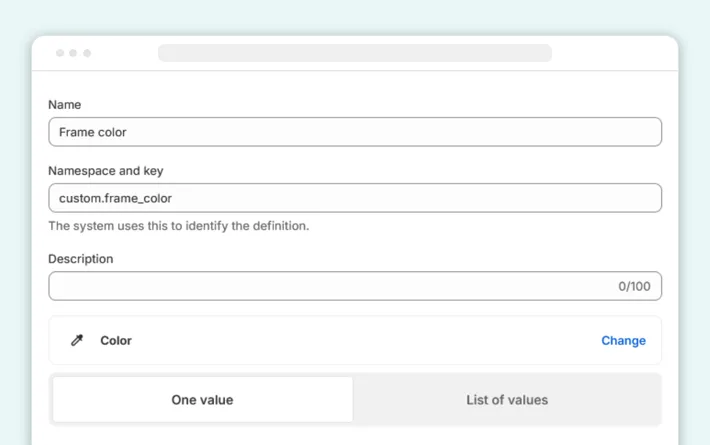
On the Add definition screen, enter the:
- Name. This is what you’ll see on the list of your metafield definitions in the admin panel (e.g., ‘Product color’ or ‘Wheel size’).
- Namespace and key: (e.g., custom.example_field). The namespace will be pre-filled for you. The key serves as the field’s reference in the code. If you enter the name of your metafield first, Shopify will automatically transform it into a key and autofill that field. If you decide to change it, we recommend you stick to Shopify’s formatting: all lowercase letters, with spaces replaced by an underscore.
- Description. This optional field allows you to note down extra information, such as what values are expected for the metafield.
Name and key may seem the same, but they serve different purposes. Think of the name as the metafield’s display name for the admin panel and the key as the variable name that will be stored in the code. That said, it’s best to keep the name and key the same to avoid confusion.
Once you’re done with those fields, select the type of data your metafield will contain (text, URL, integer, color, etc.). After you select one content type, you can choose to collect a list of values with the metafield (e.g., a list of preferred colors for a customer profile) instead of a single value.
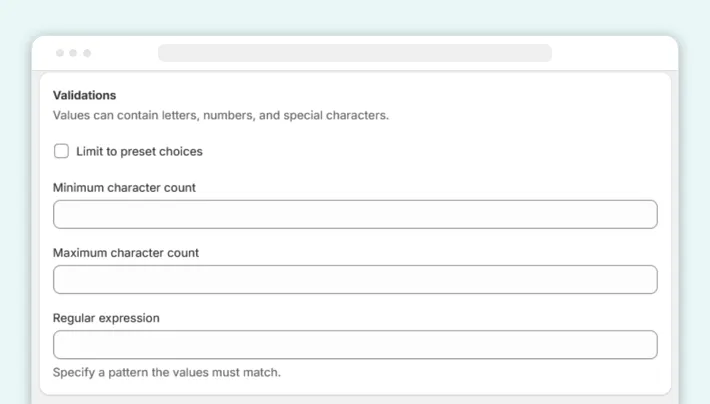
Certain content types come with extra settings. For example, a single-line text block allows you to add validation to the input, like the minimum or maximum character count:
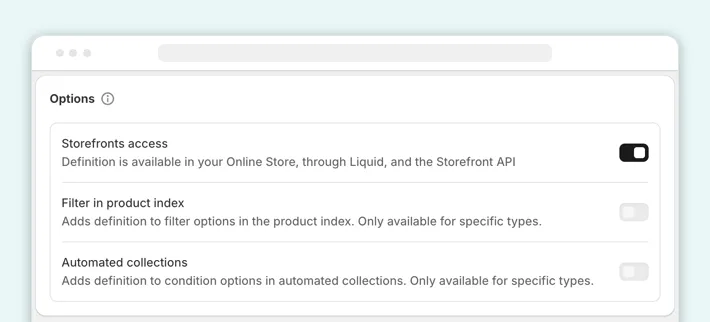
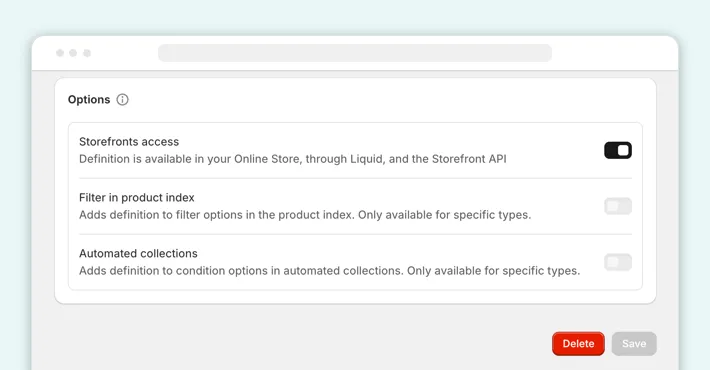
If you want your metafield to be used in the filter search or automated collections, toggle the corresponding option below:
Then, hit Save.
Note: for your metafield to function properly, it has to be pinned. All new metafields are pinned by default.
How to Add Metafields in Shopify
Now that we have our metafield with the frame color, we can add it to existing products using one of two options:
- Adding the metafield one product at a time
- Adding it to multiple products in bulk
How to Add Metafields to a Single Product
To add a metafield to a specific product, head to Products and open the product’s editing page. Scroll all the way down, and you’ll see the available metafields:
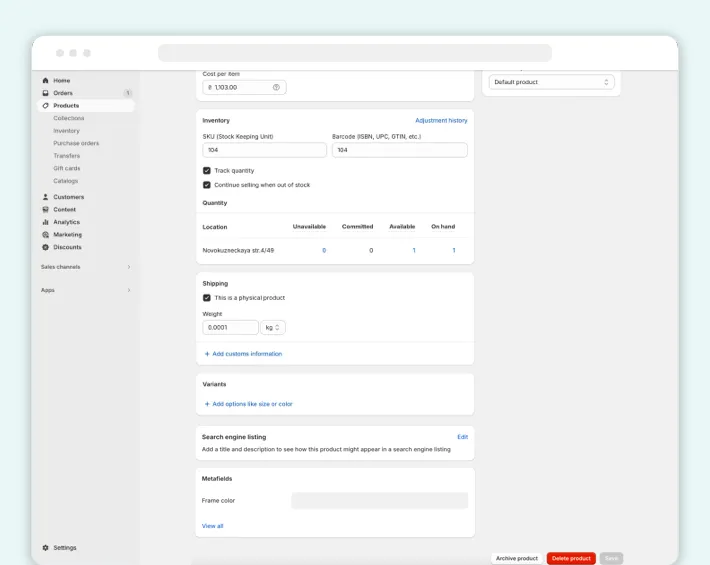
You can then add the value(s) into the metafield. To add multiple values to a list, click Add item. (To add multiple values, make sure your metafield supports a list of values, not one value, in its definition.)
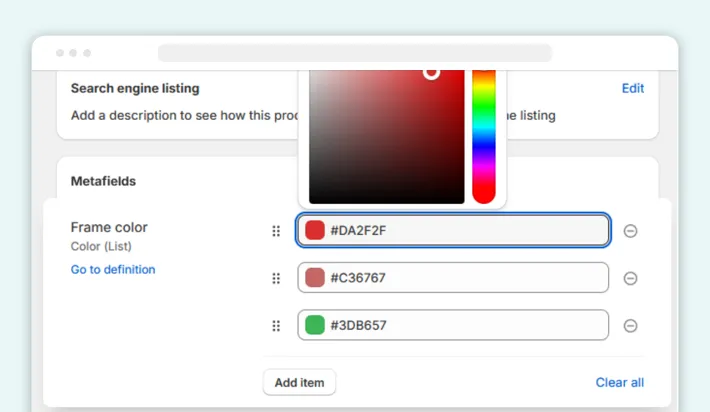
Once you’re done, click Save to update your product.
How to Add Metafields to Products in Bulk
To add the metafield to multiple products, head to Products, select products you want updated, and click Bulk edit:

In the bulk product editor, click Columns in the header, scroll down the list, and locate your metafields. Check the box to add the metafields you need (in our case, it’s the Frame color):
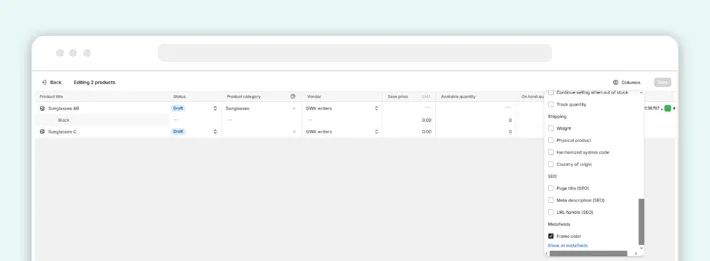
Select multiple cells in the column with your metafield’s name and double-click the selection. You’ll then see a field where you can add your value(s).

You can either add the same value to multiple products or enter different values into different cells.
Once you do, click elsewhere on the page to see if the new value got applied to multiple products:

Click Save to apply the changes and hit Back to exit the bulk editor.
How to Add Variant Metafields in Shopify
Now, if your eye is keen, you may notice that our Frame color metafield applied to the product itself and not its lonely variant in the bulk editor in the screenshot above. That’s because our initial metafield was defined for products, not variants.
To create Shopify variant metafields, go to Settings > Custom data and select Variants in the list of definitions. Then, repeat all the steps to create a metafield definition.
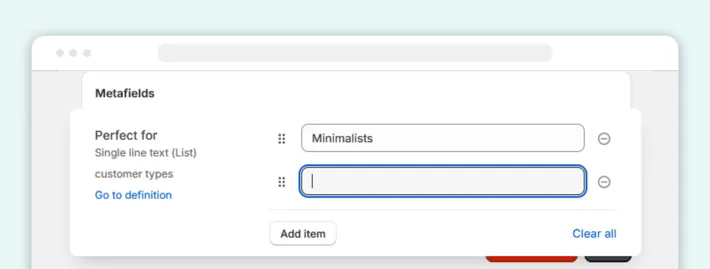
We added a new variant metafield, “Perfect for”, for our sunglasses store example. Now, to add this metafield to a product variant, head to Products, open the product editor by clicking on the product, and scroll down to the Variants section:
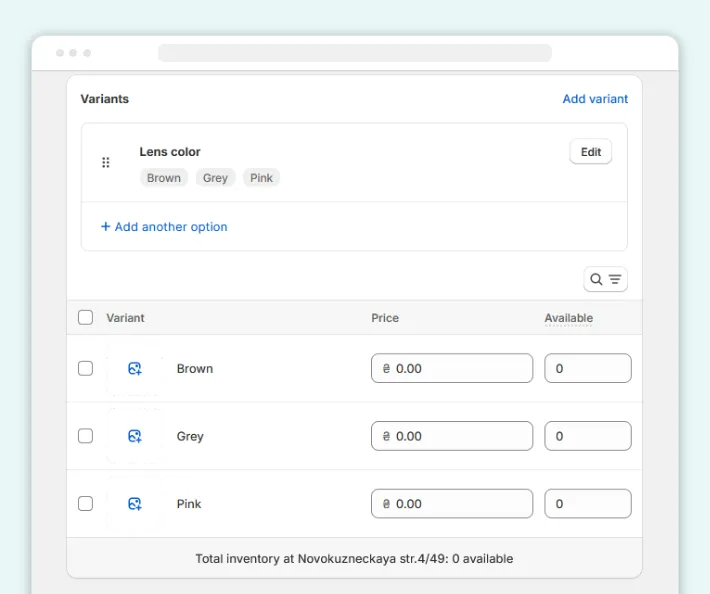
Click on the variant you want to edit and scroll down the page. At the bottom, you’ll find all the metafields that can be applied to variants:
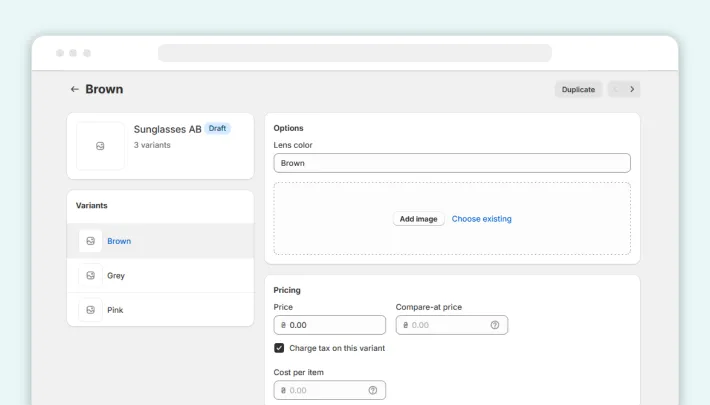

Now, follow all the same steps for adding a metafield value. Enter the value(s) and hit Save to apply the changes. You’re all set!
Note: you can’t add metafields to multiple variants using Shopify’s built-in bulk editor.
How to Display Metafields in Shopify
As long as you’re working with Online Store 2.0 themes that support JSON templates, you can display metafields in your storefront directly via the theme editor. The editor allows you to add up to 20 metafields per template.
If you’re not using an Online Store 2.0 theme, you’ll need to add some code to the theme directly.
Adding Metafields to the Product Page
To display a metafield on the product page, head to Online Store in your Sales channels in the admin panel’s left sidebar and open the Themes page. Click Customize next to your current theme to open the theme editor and:
- Navigate to the page you want to display the metafield on
- Click Add block in the section you want to add the new information to
- Select Text in the menu
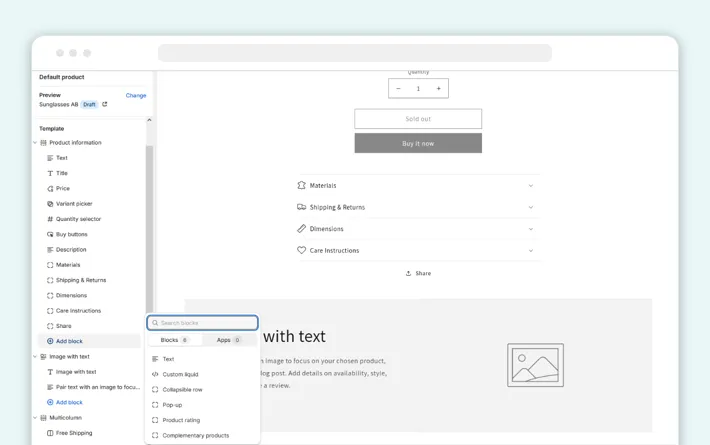
- Drag the text block to its preferred position on the page and select it
- In the right sidebar, above the field with the block content, click the button Connect dynamic source
- Select the metafield you want to add to the page in the list (in our case, it would be Style)
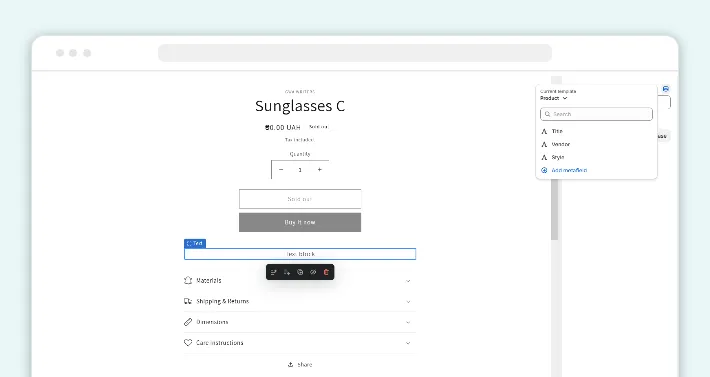
- Remove the placeholder text (‘Text block’) and add extra text in the field if needed (we added ‘Style: ’ before the metafield value)
- Click Save to apply the changes.
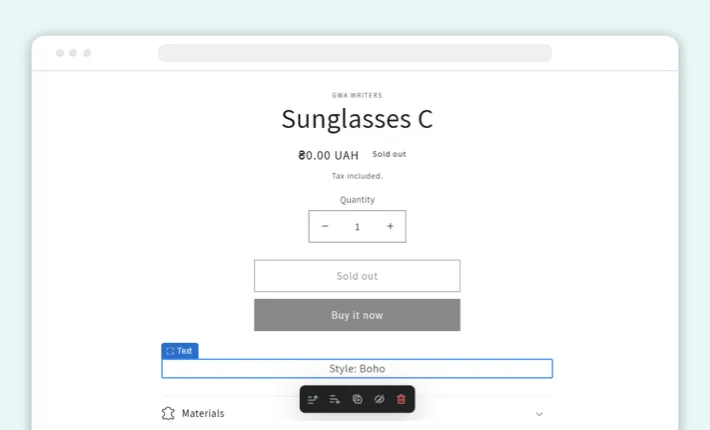
Note: the storefront access has to be enabled in your metafield definition if you want to display it. Double-check its status in the definition’s Options under the content type and number of values.
How to Edit Shopify Metafield Definitions
If you need to update the metafield’s name, description, or validation rules, you can do so in your Settings:
- Head to the Settings > Custom data
- Open the corresponding metafield category (e.g., Products)
- Click on the metafield definition you want to edit
- Introduce the changes and click Save at the bottom of the page
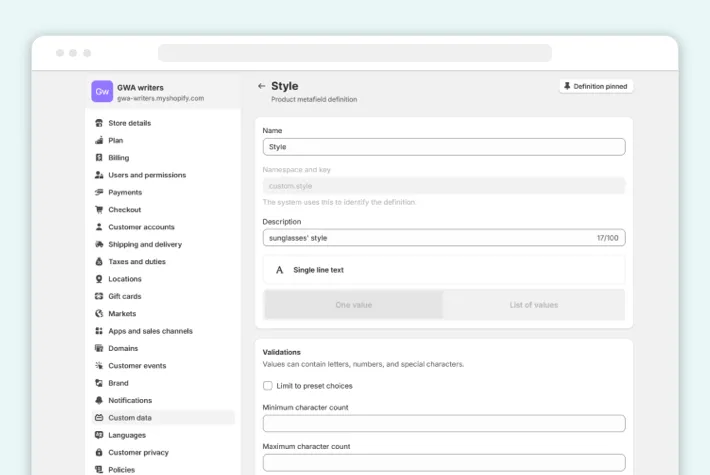
You can remove a metafield definition by clicking Delete instead of Save on the definition editing page. You can also toggle the Options like storefront access and add or remove the field as a filter in the product index.
Note: Shopify allows you to edit only a part of the definition’s properties. The namespace and key can’t be changed. The same goes for its content type and the single/multiple values setting.
How to Edit Shopify Metafield Values
To edit the values themselves, all you need to do is follow the steps outlined for adding Shopify store metafields. If you want to change a single value for a product metafield, head to the product editor, scroll down to the Metafields section, and change the value. If bulk editing is in order, use the product bulk editor.
How to Export and Import Metafields in Shopify
As of writing, the admin panel doesn’t offer a user-friendly way to export and import metafields in Shopify out of the box. That said, you still have two other options to export or import your metafield definitions:
- Use a third-party app like Matrixify or EZ Exporter
- Use a GET request to pull out the list of metafields and a POST one to add them to a new store (requires development skills)
If digging into the store code isn’t an option for you, using a third-party app for Shopify export metafields is your best chance. Refer to tutorials of your chosen Shopify app for metafields to learn how to export and import metafields with its help.
How We Use Metafields to Boost Commerce Performance
In our experience, metafields can be a potent customization tool in your toolbox. Metafields can allow users to browse skincare products based on their skin type or discover activewear items that are relevant to their hobbies.
For example, in our work on the case with Shopify metafields usage, we leveraged the Shopify metafields to implement an advanced multi-component product structure.
It allowed store visitors to find products they were interested in more easily, all thanks to the advanced filter search made possible with metafields. On top of that, every product page was made more comprehensive with extra information automatically pulled from product metafields.
But that’s not all. Here are four more examples of how we leveraged metafields for our clients:
- Winky Lux. We used boolean metafields to hide products from search results and collections pages. Metafields also served to dynamically supply icons for product pages, display relevant FAQs, and power a Pairs Well With section.
- MìLà. In this case, we leveraged metafields to power the Related Products section and display custom product and variant titles, pricing per meal, and nutrition data in a dedicated collapsed menu.
- Early Rider. This online store uses metafields to display a custom shipping date on the product page and add desktop, mobile, and logo images to collection pages.
- Flower Jam. We used metafields to create a list of related products via the product editing page in the admin panel.
Need help?
If you want to unlock the full potential of metafields, you’ll probably need a developer by your side. We can be that development partner for you. As a certified Shopify Expert, we’ve helped over 200 e-commerce companies build, customize, and develop their stores.
Whether you need to create custom metafields to enable advanced search or enhance your product structure, our decade of Shopify experience is at your service. Contact us to discuss how we can leverage metafields to help you grow your store.
In Conclusion
Shopify metafields allow you to customize your store beyond the standard Shopify fields, from order management to product pages and filter search. That said, metafields aren’t exactly straightforward if you’re a total beginner, so take your time to explore all the metafield tools at your disposal.
While you’re tinkering with metafields, make sure you don’t make any changes to your live store (if it is live, of course). Test your product and variant metafields on draft products, for example. And if you want to take your metafield efforts to the next level, consider hiring a Shopify development partner.
Frequently Asked Questions
Why use metafields in Shopify?
- Advanced filter search
- More comprehensive product description
- More extensive product discovery sections
What types of data can be stored in metafields?
- Text (rich, single-line, or multi-line)
- Product
- File
- Numbers (decimals or integers)
- Date/date and time
- Dimension
- Volume
- Weight
- Boolean (true or false)
- Color
- URL
- Rating
- Money
What benefits can shops get from using metafields in Shopify?
- Improve user experience, which can increase conversions
- Provide more comprehensive information for each product
- Customize the storefront beyond the standard fields Shopify offers
- Give the store’s SEO performance a boost
- Streamline scaling and managing the store, from orders and customers to products


